Here is another card I made this week. You can view the instructions here. Sorry I didn't feel like writing it up again, but it is a very simple card to make!
 Monday, November 9, 2009
She's Expecting Twins Card
Here is another card I made this week. You can view the instructions here. Sorry I didn't feel like writing it up again, but it is a very simple card to make! Wednesday, November 4, 2009
Christmas Cards
Please forgive the pictures. My camera doesn't take close ups very well...For these cards, I actually used an embosser. Not a heat embosser, but the kind you use kind of like a pencil with a stencil. 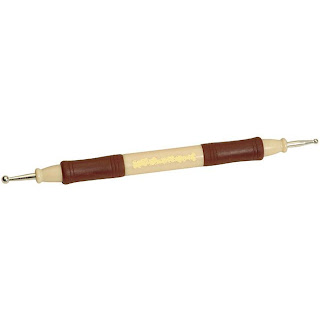

You can get one of these at your local craft store for around $5. You can get brass embossing stencils for fairly cheap, as well.
 It's hard to tell in the picture, but I used pop dots to make the hat and scarf stand out.
 To get the "antiqued" look on the holly leaves, I took a piece of sandpaper to it over the embossed part.
 The snowflakes are the embossed part on this one. I added a bit of glitter to make them stand out better. I also used ink to chalk around the edges of the papers.
Monday, October 26, 2009
Skeleton Card
 Holidays always give me an excuse to make a card! This card was very simple. I just pulled some scrap paper that I had from scrapbooking. I got the skeleton from michaels for less than a dollar and it came with a frankenstine as well. I will use it on another card. The ribbon I got for less than a dollar and it has 4 feet on the roll. I love themed ribbon! I just used a white gel pen to stitch around the themed paper and used black card stock for the card. Card took about 15 minutes to make.
Some fall pumpkins
I have to tell you that these were made by a friend of mine. Mine aren't quite done - I still have to get some ribbon from the craft store.
 For this project you will need:
McCalls pattern #5490
Hot glue gun and glue sticks
Thread
Twine
2 or 3 bags of polyfil (depending on how full you want your pumpkins)
Ribbon for trim
Fabric as follows:
For the large pumpkin:
1/4 yd each of 3 different types of fabric
9x9 remnant (for stem)
For the medium pumpkin:
1/4 yd each of 3 different types of fabric
9x9 remnant (for stem)
For the small pumpkin:
7" each of 3 different types of fabric
9x9 remnant (for stem)
Follow the directions on the pattern. It didn't take long at all. They are cute and can be used for Halloween or Thanksgiving!
Monday, October 19, 2009
Fall Wreath

For this project you will need:
An empty wreath (plain with nothing on it)
Craft Riboon or a large bow
Silk fall leaves
craft or floral wire
Hot glue gun and extra sticks (I used about two and a half sticks on this wreath)
Larger fall foliage (I used some fall grass from walmart - you could get some at most any craft store in their fake floral section)
Some fall fruit/vegetables, etc. (I used a pumpkin, a pear, a squash, and a pinecone)
I like to overdo the way I attach things whenever I make wreaths or garland. I am always afraid something will fall off. Using both craft wire and hot glue assures that things will not fall off. Wrap the craft wire very tightly around whatever it is you are sticking to the wreath, then wrap the remaining wire tightly around the wreath. Then using the glue gun, glue the item near where the wire is. Arrange your items on the wreath however you want them. Be creative and have fun with it!
Saturday, October 10, 2009
Haunted Houses

I love finding new blogs that are crafty. It is so fun to get ideas and it is so nice when they give you tips on how to make their great projects on their own blog. My Aunt actually made these Halloween Haunted Houses herself and she referenced the blog where she found them. I thought they were so cute! You can find them here and some of her other fun crafts.
Saturday, October 3, 2009
Fall Leaf Candle Decoration for $4!!!
 I love Creations by Kara. She made this adorable little Fall Candle to put in her home for only $4. That includes everything even the hurricane vase. You can view this craft here.
Subscribe to:
Comments (Atom)